--------------------------------------------------------
Dual-Opposed Infinity Kappa 12dvq sealed subwoofer build
--------------------------------------------------------
Build updates
==========
------------
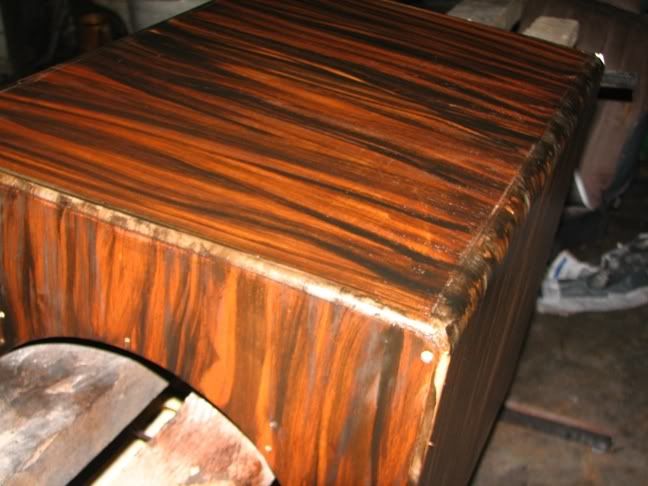
Nov. 9, 2009
------------
Finally got some time to finish my dual-opposed sub. Pics:
With grill:
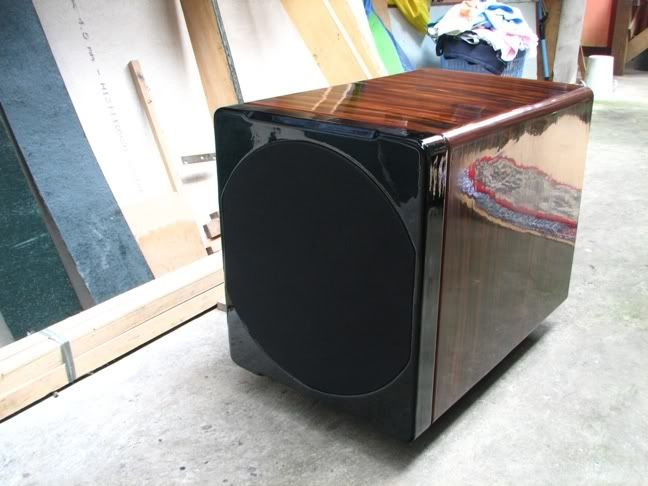
Without grill:
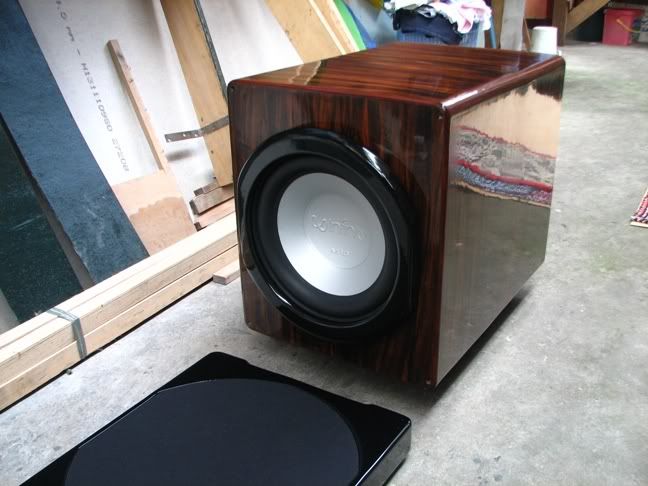
Close-up:
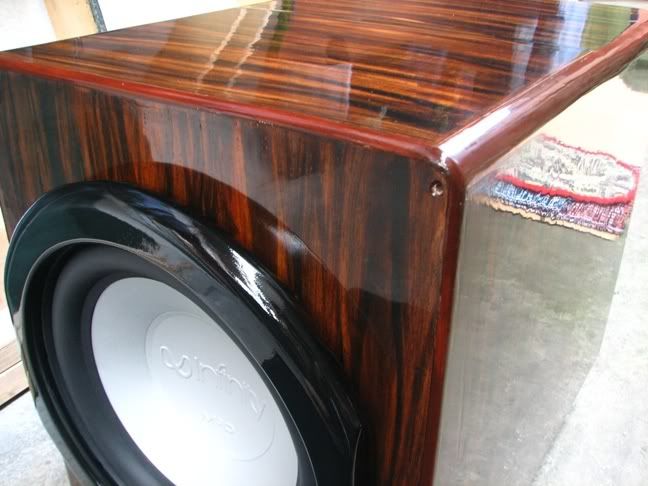
Inside Room:

-------------
Oct 26, 2009
-------------
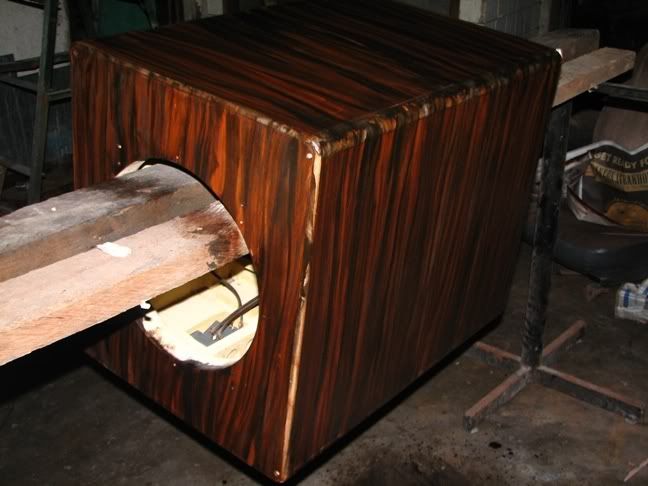
After a few months, ginanahan ulit ako ipagpatuloy ang build ng infinity sub.

Medyo mahirap talaga gayahin wood pattern ng RS1 ko, anyway ok na rin ito para saken
The 2 black piano grills and the rings for the front and the rear of the sub:
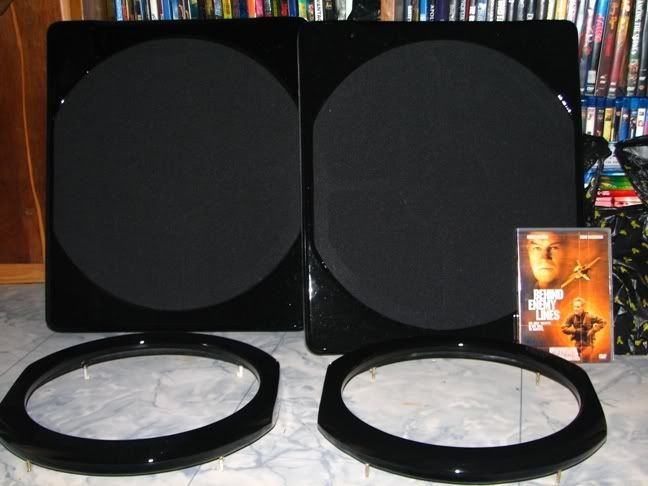
Planning to finish the box with polyurethane air spray.
--------------
July 21, 2009
--------------
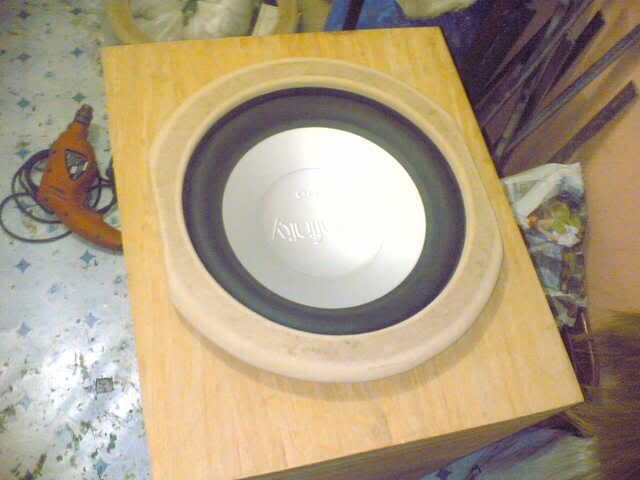
Rounded the corners and attached the terminals on the under side
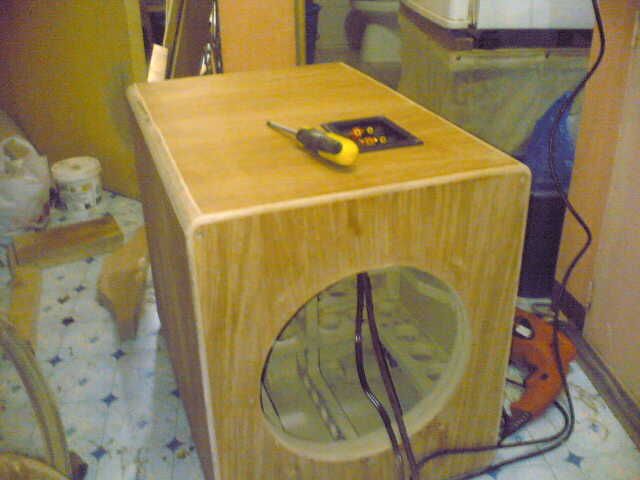
And before I do the finishing, I tested it first
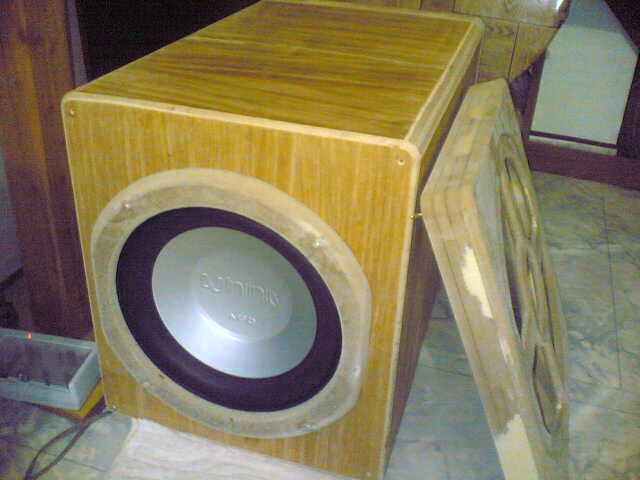
Initial impresions:
* Sounds tight and is very agile, it rides with the beat
* Does not go very deep unlike my dual 13Av but I like its midbass punch when low-pass is set to 120Hz
* I was actually expecting to have zero vibration of the walls at high levels but it's not the case here, it still exhibits a some form of vibration but it decays very fast. I think it still meets my expectation to cut the vibrations, or maybe I still need some more damping.
--------------
July 10, 2009
--------------
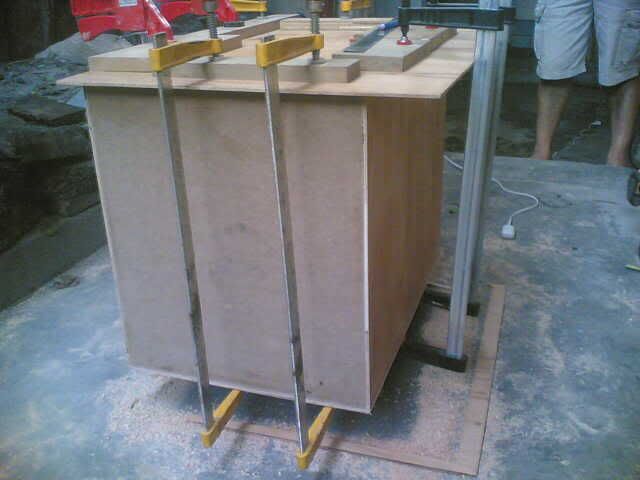
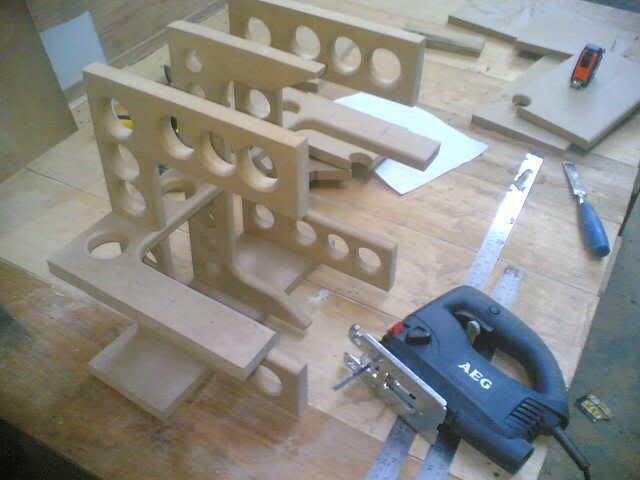
Panels Joined: Seems I need to buy some more clamps. You can never really have too much clamps especially when joining many panels at same time.
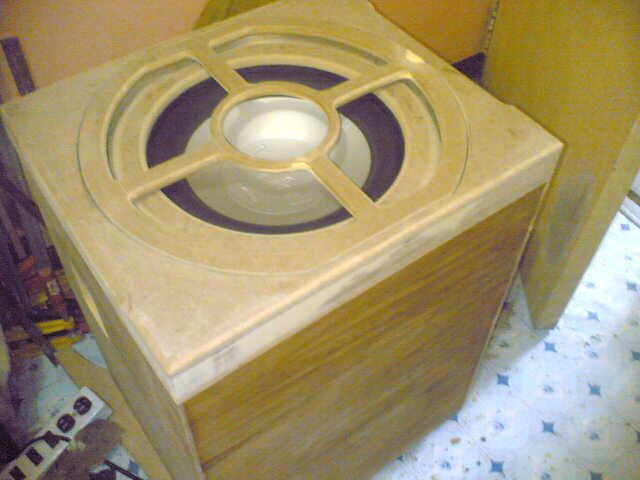
Front Panel Design: Screws and driver rubber ring is hidden for a less industrial looks

Front Panel Design: This top cover will hopefully be painted with black piano finish
Grill Design: I took a little more effort for the design of the grill. Inner ring with crossed design will be wrapped in grill cloth and outer ring will be corner rounded and painted black piano finish
* The topmost narra ply panel will be painted rosewood piano finish and corners rounded using 1 1/2 round corner router bit.
* Development is very slow as I can only give a few hours every weekend for it.
* The box is screwless, I believe wood adhesives are more than enough to strengthen the joints, so screws are not really needed. Besides, it would be hard to round corner the box if screws are used. And one needs to hide these screws for very fine outer finish.
--------------
June 15, 2009
--------------
One side of the bracing, the other is already mounted inside the box:
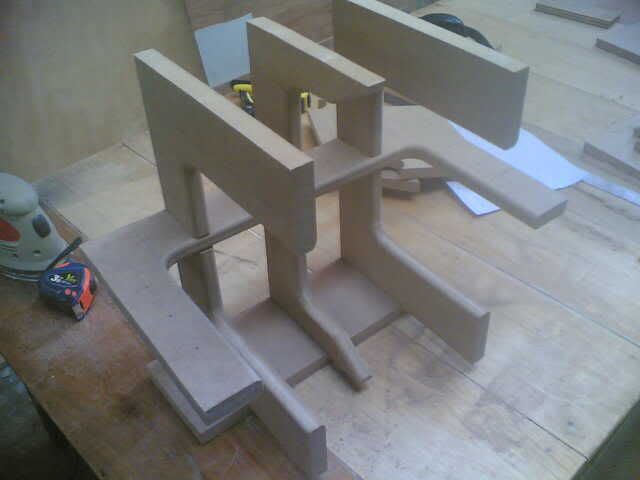
Larger pic:
http://i86.photobucket.com/albums/k104/nfalabi/Ungluedbracing.jpgI put some holes on the bracing to reclaim some volume and make it lighter:
Larger pic:
http://i86.photobucket.com/albums/k104/nfalabi/Bracingwithholes.jpgBracing glued to the box:
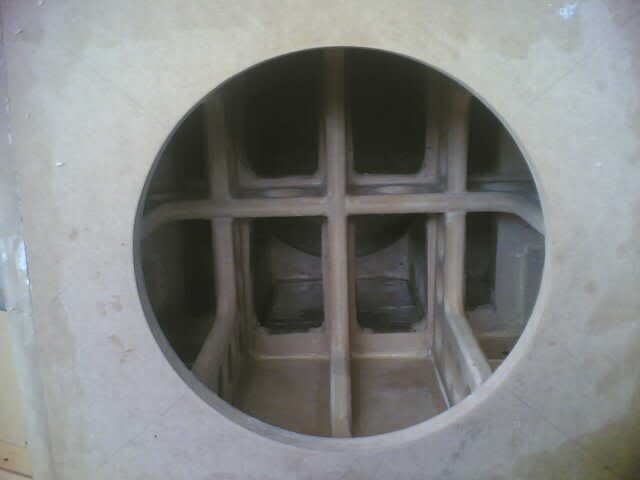
Larger pic:
http://i86.photobucket.com/albums/k104/nfalabi/Bracinggluedtobox.jpg--------------
June 11, 2009
--------------
Im now ready to proceed with my second DIY build. This time it will be a simpler and smaller sealed sub. Actually this is the very first box that I will make by myself since the first one is only my design but was built by Earl Estrera.
The goal of this build is to make a sub for use with my music-only tube setup, target range would be 40Hz to 120Hz. The box should be very transparent and non-coloring to allow the sub driver to reach its full potential.
Here are the sub-goals:
1. The sub will be using 2 pieces Infinity Kappa Perfect 12" dvq in a dual-driver opposing configuration. The reason for picking the Kappa is because of it's measured linearity up to moderate listening levels. Although it has high distortion in the below 40Hz range, it has a very low distortion profile at 40Hz and above making it superb for music use IMO.
More info can be found here:
http://www.hometheatershack.com/forums/subwoofer-tests/978-diy-infinity-kappa-perfect-12-a.html2. The driver will be fitted in a dual opposed config in 2 cubic feet internal volume sealed box. I previously planned to make 2 separate boxes for the 2 drivers but I changed my mind as I really want to test myself how the dual opposing config will behave. According to my readings, a dual-driver in opposing configuration will cause the drivers to exert equal forces in opposite direction thereby resulting to a theoretical net force of zero which will then translate to a virtually vibration-free box. I hope this will work.
My reason for using 2 drivers is that since using 2 drivers will effectively double the cone area and power handling, it will result in a theoretical 6dB of more output, thus for a given output the excursion is effectively halved resulting in a cleaner output especially at moderate to high volume levels versus using 1 driver only.
3. The box will be thoroughly braced and will be stuffed with fiber fill for a non-flexing and non-resonating walls.
4. The outer finish will be glossy rosewood to match my MA RS1 fronts.
Here is my initial drawing of the box using Google Sketchup:
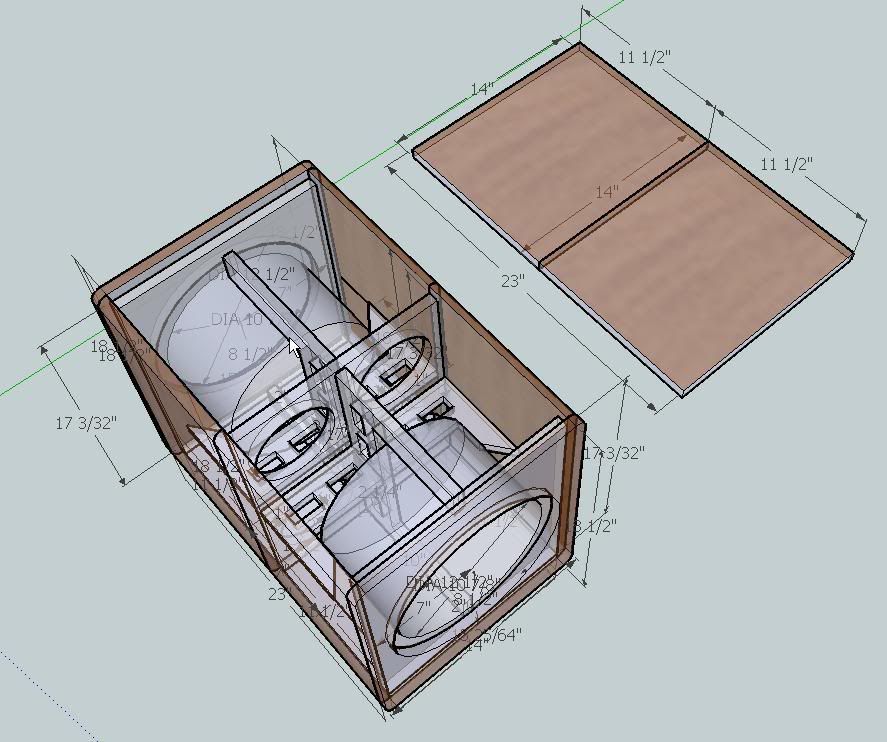
Larger pic:
http://i86.photobucket.com/albums/k104/nfalabi/Dualkappa2cusealed.jpg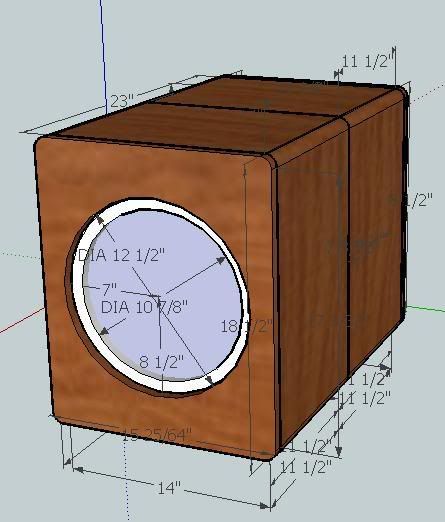
Larger pic:
http://i86.photobucket.com/albums/k104/nfalabi/DualKappaouterfinish.jpg==============================================================================


