Author Topic: RXV's D.I.Y. builds  (Read 27336 times)

0 Members and 1 Guest are viewing this topic.

Offline RXV

  • Trade Count: (+112)
  • DVD Guru
  • ****
  • Posts: 1,528
  • The difference is in the detailsssss...
  • Liked:
  • Likes Given: 1
RXV's D.I.Y. builds
« on: May 26, 2015 at 06:26 PM »
Hello fellow PDVDer's,

I would like to share some of my D.I.Y. builds in this thread for the sake of sharing ideas and tricks to our growing community. I have learned so many things from generous and helpful members here, and now, I would like to share my ideas in return.

I have always been a D.I.Y.'er since my younger days, from my first speaker build made from recycled wood and karaoke speakers, to car audio works and speaker and subwoofer boxes. I was always fascinated by the challenge and skillset of building everything from scratch. I always believed that you can create wonderful works of art without having to spend an arm & a leg, if you really put your passion and skill into it.

Can anyone do D.I.Y.? Definitely!
But can anyone do D.I.Y. professionally? IMHO, realistically, no. Like a lawyer or a doctor or an architect, it takes a certain mindset and skillset to practice and master. You can literally hurt yourself without the proper care and knowledge of handling of tools and machinery. But of course everyone is welcome to learn and experience. That is what makes D.I.Y.'ing so fun and challenging. And the big grin in your face everytime you see your own masterpiece creation, is simply something that money cannot buy.

Please note that I am not a professional woodworker nor a carpenter. Like others, I make many mistakes or flaws and learn from them from experience. I'm only a guy who loves it as a hobby and likes creating things from scratch. That way, it is always challenging and fun. If you have any comments or see some mistakes in my build/thoeries, feel free to inform me, I'm always in the never-ending process of learning :)


D.I.Y. FAST TRACK
---------------------------------------

Markaudio Alpair 10P Full Tower Enclosure
http://www.pinoydvd.com/index.php/topic,200549.msg2273281.html#msg2273281

« Last Edit: May 29, 2015 at 11:13 PM by RXV »
FB: W Acoustics
Shopee: w_acoustics
IG: w_acoustics
OLX: wacoustics
VIBER / CONTACT: 0927-7904686

Offline RXV

  • Trade Count: (+112)
  • DVD Guru
  • ****
  • Posts: 1,528
  • The difference is in the detailsssss...
  • Liked:
  • Likes Given: 1
Re: RXV's D.I.Y. builds
« Reply #1 on: May 26, 2015 at 06:27 PM »
D.I.Y. BUILD: Markaudio Alpair 10P tower enclosure


FAST TRACK (Jump to):
The Enclosure Design http://www.pinoydvd.com/index.php/topic,200549.msg2273282.html#msg2273282
The Wood Material and Cutting http://www.pinoydvd.com/index.php/topic,200549.msg2273283.html#msg2273283
The Skeletal Bracing and Side Panels http://www.pinoydvd.com/index.php/topic,200549.msg2273284.html#msg2273284
Completing the Enclosure, Leather wrapping and the Baseplate http://www.pinoydvd.com/index.php/topic,200549.msg2273285.html#msg2273285
Brushed Aluminum Speaker Terminal http://www.pinoydvd.com/index.php/topic,200549.msg2273286.html#msg2273286
Completing the Finishing Details http://www.pinoydvd.com/index.php/topic,200549.msg2273286.html#msg2273287
Upgrading the In-Cabinet ACoustic Fill  http://www.pinoydvd.com/index.php/topic,200549.msg2273286.html#msg2273288


THE CHALLENGE:
1. To D.I.Y. a full tower speaker enclosure all made from raw/basic materials/components.
2. To create an enclosure that is both rigid and acoustically designed for the drivers to be used.
3. To design an enclosure and where some parts can be changed/altered to fit different environments(rooms) for future use (in other words, changeable/adaptable design)
4. All parts must be hand-made/sculpted using tools and standard equipment easily purchased from any local hardware store.


SPEAKER ENCLOSURE FINAL BUILD FEATURES:


WHY I CHOSE THE MARKAUDIO ALPAIR 10P:
Ever since I've heard a fullrange driver sing for the first time, I never looked back. The way it depicts the "midrange magic" never fails to give me goosebumps. The highs aren't over-fatiguing but the details are there, and the bass is adequate for SQ and critical listening. Of course, it isn't a perfect system in itself. Heck, even branded/commercial speakers I've heard costing multiple times its price point still can't literally project the full range frequency spectrum of sound. In other words, for the price that I paid for, the experience and contentment that I benefit from it is priceless and beyond description.

I chose the Markaudio Alpair 10P because based on actual reviews from both amateur and professional members at diyaudio, it projected the best midrange voice and overall SQ in Markaudio's lineup (also in par with Alpair7.3, which I also bought but used for car audio instead). I chose the Alpair 10P (paper cone) over the Alpair 7.3 (metal cone) for home audio use, because:
1.) I am a fan of the smoothness of paper cone sound signatures,
2.) It outputs more natural bass (in Pensil enclosure design), and
3.) I used the Alpair 7.3 (4" diameter) instead for car use since it would fit my dashboard (Mark Fenlon, creator of Markaudio, advised me to use metal cones instead of paper cones for car use, due to our hot and humid climate). Baka daw mag-deform kung paper cones katagalan.

Another driver alternative was the Audio Nirvana fullrange driver(s). I first heard it at sir Remington's place (very kind and cool person by the way), and it was indeed very very good. But I ended up with the Alpair10P because it required a smaller box (for my small room), it was cheaper (cost), and because it presented itself that I was able to acquire it immediately (The Audio Nirvana can only be ordered from the U.S. in which I didn't have time to wait). Next time, I'll definitely get one of these :)

Jun, parinig naman ng 10-incher mo :)
« Last Edit: May 29, 2015 at 09:35 PM by RXV »
FB: W Acoustics
Shopee: w_acoustics
IG: w_acoustics
OLX: wacoustics
VIBER / CONTACT: 0927-7904686

Offline RXV

  • Trade Count: (+112)
  • DVD Guru
  • ****
  • Posts: 1,528
  • The difference is in the detailsssss...
  • Liked:
  • Likes Given: 1
Re: RXV's D.I.Y. builds
« Reply #2 on: May 26, 2015 at 06:27 PM »
THE ENCLOSURE DESIGN:
The enclosure design is based on the tested and proven Pensil plans. Why fix it if it ain't broke, right?
It also had an optional full internal bracing for added rigidity (as seen in the illustration below)


Was the internal bracing worth the hassle of making it? For me, oh yes, definitely! A knock-on-wood test on the finished enclosure would let you know how rigid it is. Also, you won't hear any distortion coming out of the enclosure rattling or flexing. The bracing also touches the rear magnet of the drivers, which in turn absorbs any possible distortion/ringing from the backside of the drivers and distributes them evenly across the whole enclosure, minimizing the effects of any distortion heard.

Although the Pensil plan is a bulletproof and tested design for the Alpairs, there were some factors that made me decide to change or improve the design (aesthetically and practically):
1. The box for me was too simple and "boxy". Knowing my "perfectionist" attitude, I wouldn't be contented in making just a simple and ordinary (commonly used) design.
2. The box was too "short" for me, meaning, "pandak ang tunog". The singer was usually below ear level, so usually people tend to slouch in their seats or put wooden/rubber wedges at the bottom base to compensate/adjust proper imaging.
3. Although practical, I didn't like the idea of a removable back cover (based on original Pensil plans) because it could possibly lead to leak issues, loosened screws, and the bracing isn't permanently fixed/glued to the backside, and also because it looked so D.I.Y.'ish

So I ended up making a mixed version of the Pensil plan, and the Frugel-Horn plan (as illustrated below):


The Frugel-Horn design had a front slope of 5 degress (pointing slightly upward), which had the perfect imaging height for me based on actual testing and demoing. I also added removable feet spikes to add even more height and also for aesthetic purposes.

Here is a picture of a recycled carton box drawn with the angled design slope:


Then the actual model cut-out of the of the enclosure (resting against a door):


Meanwhile, while the enclosures were being made, I already built a temporary OB enclosure for both the Alpair 10P and 7.3, strictly following Mark Fenlon's burn-in procedure:


I also sampled different staining colors for the side hardwood:
« Last Edit: May 27, 2015 at 07:17 PM by RXV »
FB: W Acoustics
Shopee: w_acoustics
IG: w_acoustics
OLX: wacoustics
VIBER / CONTACT: 0927-7904686

Offline RXV

  • Trade Count: (+112)
  • DVD Guru
  • ****
  • Posts: 1,528
  • The difference is in the detailsssss...
  • Liked:
  • Likes Given: 1
Re: RXV's D.I.Y. builds
« Reply #3 on: May 26, 2015 at 06:28 PM »
THE WOOD MATERIAL:
Upon researching for the best wood material, most people say online that birch plywood is the best material for speaker box making and resonance. This was my target material, but due to budget constraints and size dimensions per cut, I looked for the next best alternative (Thanks to sir Timber for the birch ply supply opportunity).

Thanks to some recommendations from member(s) here and other sites, I landed with Sta. Clara marine plywood, which was a popular choice with boat makers. It has very few voids (around 5% estimate), real grade "marine certified", and is very dense. It is even heavier than 4'x8' MDF when I tried to carry it. It is double the price of normal plywood, but worth the quality (Birch ply locally is around thrice the price of normal plywood and has smaller dimensions than 4'x8').

NOTE: Please be warned that there all lots of fake Sta. Clara plywood being sold around Metro Manila, so do your research and know the authorized dealers for your own assurance of quality.

CUTTING THE PLYWOOD:
Here the plywood has been marked and ready for cutting (sorry for the crappy pics, but there are ballpen marks on the plywood). Wood is cut using a circular saw as well as a jigsaw for curvy patterns:


Cutting completed:


Circle-routing the driver holes:


Perfect circle every time!:


Both front side holes done:


Picture of the lower port hole (I chose to revise the Pensil plan and integrate the hole into the front face of the enclosure and rounded the hole edges for a better look, and "no-dugtong"):


I revised the design for the driver holes to be "double-flushed", meaning that the drivers are flush-mounted, as well as the speaker grills are also flushed. The front holes are bevelled using a router to avoid any reflections off the wall lining as well as for aesthetic purposes:


I had to add an extra small plywood layer behind the first layer to achieve the "double-flush" effect:


Side view of the extra back layer (curved at the edges):


Picture of the rear hole for the flush-mounted speaker terminal plate. Instead of following the original Pensil plan of having a removable full rear cover, I decided to just cut a hole big enough for my arm(s) to fit and be able stuff/adjust acoustic filling inside if needed. That way, the internal bracing's rear is permanently glued to the back side of the enclosure, making it more rigid and less prone to vibrating/moving:
« Last Edit: May 27, 2015 at 07:37 PM by RXV »
FB: W Acoustics
Shopee: w_acoustics
IG: w_acoustics
OLX: wacoustics
VIBER / CONTACT: 0927-7904686

Offline RXV

  • Trade Count: (+112)
  • DVD Guru
  • ****
  • Posts: 1,528
  • The difference is in the detailsssss...
  • Liked:
  • Likes Given: 1
Re: RXV's D.I.Y. builds
« Reply #4 on: May 26, 2015 at 06:29 PM »
THE SKELETAL BRACING:
The bracing material is also made from Sta. Clara plywood. I decided not to follow the original plan of having circular holes in the bracing or "holey bracing" as they call it, because:
1. It is too time consuming to router all of the holes
2. The area of the holes would be bigger if they were not circles (maximizing internal volume)
3. It would not be seen anyway once the enclosure is done, so why bother making it look good

Picture of the bracing (ginabihan na ako hehe):


All bracings done:


Another angle of the bracings:


Side view sample of the bracing inside the enclosure (mock-up):


Another angle with the small lower bracings included (mock-up):


Full view of the entire enclosure with internal bracing:


Clamping and gluing the internal skeletal bracing with wood glue. I used Elmer's wood glue and/or Stikwel depending on the wood to be glued:


Once dried, the bracing can stand on its own:


This is the part of the bracing where the rear magnet of the driver will be touching. I applied a thin layer of cardboard (replaced it with rubber foam after) as a +/-2mm allowance for the magnet to surely touch the wood.


THE SIDE PANELS:
This part in my opinion was the hardest to make and finish. The construction tooks only a couple of days to make, but the finishing stage was the one that literally destroyed my back and took the longest time because you can't rush it, so you have to be very patient.

I designed the panels to be removable because I wanted the speaker enclosure to "evolve" with me as time goes by. If in the future, if I relocate the speakers into another room or place, I could just change the overall look/theme of the enclosure by swapping side panels to my liking.

My first choice was to create sidings made of hardwood planks and stain them classic cherry color. I always wanted a classic looking speaker ala Sonus Faber style, and this one fits perfectly.
My other future wood siding ideas are:
1. Graphite black wood with gloss topcoat
2. Bird's Eye Maple veneer or any other fluid-looking wood patterns
3. Metallic White Paint with black carbon fiber trim
4. Anything goes! Please give suggestions if you want :)

I've been searching before for wood panels locally, for the longest time, that had horizontal lines to create the illusion of a longer(depth) enclosure as well as fluid lines that seem to come alive depending on the angle of the light that shines on the wood. But sadly, it is either very difficult or costly to acquire one, let alone special rare wood and their wonderful patterns).

Here is a sample picture of a Sonus Faber wood sidings with horizontal patterns:


So I decided to just create my own horizontal lines and purchased wood planks at a local hardware wood store and create them on my own. I really tried to find planks that were identical in color. When I chose them (under the sun), they looked almost color-identical, but when I got home (under artificial light), they were all different! Oh well!
TIP: Purchase wood coming from a single tree if possible, so that you end up with the same color for all planks as well as have the same wood patterns (they are all unique and different!)


Planks cut to size and sample-fitted to see what it looks like at the side of the enclosure:


Another side view (mock-up):


I had a hard time deciding if I'll arrange the plank colors in stripes, same color per side, or randomly.
I chose same color per side (as much as possible). I regret this decision now hehe (I now want random) :


Literally started gluing the planks one by one and clamping them ( there is a plastic-wrapped plywood at the bottom for the planks to clamp on to). Used Elmer's wood glue for this one:


One side complete. Let them dry overnight, then three more to go!:


TIP: Please ensure that floor is dead flat, as to make sure that your planks won't curve up when glue already dries. I put weights on top just to make sure no plank would move while glue is still drying. Clamps are sandwiched with thick carton and flat wood cut-outs as not to dent the planks from the pressure:


Glue all dried up. Believe it or not, it is very strong. The planks won't separate anymore. I once made a mistake of the whole siding accidentally falling flat to the floor. Booom! Good thing it survived :) :


Here's a picture of the excess edges trimmed:


Picture of the angled-cut of the sidings:


All sidings hole-drilled with a drill bit for the bolts:


Close-up of the drilled holes for the stainless bolts (so that it could be attached to the main enclosure via T-nuts):


Side panels bevelled at the edges:


The left side panel is bevelled, while the right panel's edge is smoothened out even more by manual sanding:


Close-up of the curved edges (right panel):


Believe it or not, the curves in the edges was one of the most time consuming and exhausting part of this project. It seems pretty easy and straightforward, but it is not. I did all of the curves manually by sanding them one by one (using 80 grit first, which introduced a lot of scratches but cut/sand way faster, then finer grit to smoothen them out) until I got the curve that I desired. I could have used a round bit via a router, but it didn't have the angled cut that I was looking for. So manual it is!
« Last Edit: May 28, 2015 at 03:44 PM by RXV »
FB: W Acoustics
Shopee: w_acoustics
IG: w_acoustics
OLX: wacoustics
VIBER / CONTACT: 0927-7904686

Offline RXV

  • Trade Count: (+112)
  • DVD Guru
  • ****
  • Posts: 1,528
  • The difference is in the detailsssss...
  • Liked:
  • Likes Given: 1
Re: RXV's D.I.Y. builds
« Reply #5 on: May 26, 2015 at 06:29 PM »
COMPLETING THE ENCLOSURE:
Lower visible parts painted flat black:


Enclosure glued together, then front edges were beveled to further reduce the boxy look and add more sexiness and depth to the front facia.


Ports painted flat black:


Mock-up of partially completed enclosure(s):


Another angle shot:


Top view of the inside of the enclosure with skeletal bracing installed. Note that the bracing is intentionally off-center as per bracing plans (as are lower bracings), for better sound random diffusion. Also note the T-nuts installed on the side walls:


Thick felt was applied to the sides of the bracing where the driver area is located, to reduce/absorb any reflections that may bounce of the bracing wall:


Enclosure is stuffed with fiberfill, as per original plans, although I only used about 70% of total recommended fiberfill to be used (I could adjust next time anyway):


I also applied thick felt at the back side of the enclosure (opposite the driver) since it is a bit denser than the fiberfill:


Top view showing the fiberfill not blocking the path towards the ported slot at the bottom of the enclosure:


View from the front driver hole:


View from the rear speaker terminal plate hole:


Finished sealed raw enclosure:


Both towers face to face (note the sloped angle):


Enclosures are fully smoothened and gaps and irregularities are filled with bodyfiller and sanded down.
The only con about using plywood is, unlike MDF, it isn't naturally or readily smooth because of the natural wood grain patterns, so you have to smoothen it out with putty or body filler.


WRAPPING THE ENCLOSURE WITH LEATHERETTE:
I chose to wrap the entire enclosure with premium German leatherette instead of painting it because:
1. There is a certain luxurious look and feel to it.
2. It can easily be cleaned by damp cloth and/or leather conditioner
3. I've always wanted a Sonus Faber style leather wrap look

I used to contact cement to adhere the leatherette to the enclosure in one single pass (from bottom to front to top to back to bottom again), meaning there is no "dugtong" from front to back to avoid any possibility of any peeling in the future. Although it seemed pretty and straightforward easy to do (adhesion), it was actually a very long process and it took me 2-3 hours just to patiently adhere the leatherette into place, use a heat gun to soften and stretch some parts that require stretching (banat), "massaging" some areas especially at the corners/edges, and then trimming off any excess leatherette with a cutter blade:


Picture of the front area done:


Picture of the rear area done:


CREATING THE BASEPLATE:
I decided to add a wooden baseplate to the enclosure for it to have a wider stance as well as more balance due to the sloping design of the enclosure. The baseplate is 1" longer (at the rear part) than the top rear of the enclosure to prevent the top from being hit into the wall and possibly scratching the leatherette. It is also designed to aesthetically further emphasize the slopey look of the enclosure:


Some mock-up tests for the baseplate look:


Sample fitting with wooden baseplate cut with a jigsaw:


Actual picture of the wooden baseplate. The edges have been beveled and design has been rounded to match the rounded curves of the side panels. It will be then smoothened, and painted gloss black using automotive paint:
« Last Edit: May 28, 2015 at 03:46 PM by RXV »
FB: W Acoustics
Shopee: w_acoustics
IG: w_acoustics
OLX: wacoustics
VIBER / CONTACT: 0927-7904686

Offline RXV

  • Trade Count: (+112)
  • DVD Guru
  • ****
  • Posts: 1,528
  • The difference is in the detailsssss...
  • Liked:
  • Likes Given: 1
Re: RXV's D.I.Y. builds
« Reply #6 on: May 26, 2015 at 06:30 PM »
CREATING THE BRUSHED ALUMINUM SPEAKER TERMINAL:
I was searching locally and online for a good rear speaker terminal to purchase. I wasn't pleased with using just the normal black plastic binding posts used in subwoofer boxes. It had to be special, luxurious, and different. So I decided to just create my own terminal plate from scratch.

I luckily had extra aluminum plates (3mm thick) which I bought from aluminum shops in Recto, which I was supposed to use for my DIY subwoofer plate amp which did not materialize. So I just used it for this project:


Picture of the aluminum plate being dirty and having scratches (CAUTION: aluminum can easily be scratched because it is a lot softer compared to steel):


The plate is measured and marked to size, to be cut using a jigsaw with a blade designed for cutting metal. (TIP: I applied masking tape to the underside base of the jigsaw, as not to scratch the aluminum plate while cutting it):


I had to sand the aluminum plate with a sanding machine, using 120 grit sandpaper, then 240, then 400, then 600/800 to slowly smoothen out any scratches. The deeper the scratches, the harder to smoothen out, so avoid deep scratches if possible. The picture shows the plate sanded with 120 grit, that's why it's still cloudy:


Screw holes are drilled using a drill bit:


Screw holes are then "slightly" drilled using a bigger drill bit (the size of the wood screw head to be used), so that all screws are flush-mounted on the aluminum plate:


Close-up of the plate with a wood screw test-fitted on the hole in the right:


Test-fitting at the back side of the enclosure. It fits so precisely that it doesn't fall off even without using screws:


Drilled more holes for the binding posts and the attenuator knob:


Sanding again to remove sharp and rough spots of the holes.
TIP: Cut the aluminum plate to size and all drill holes FIRST, before sanding. That way, you won't have to re-sand again like I did (I was experimenting during this time with sanding and brushing so I had to learn the hard way):


Now the fun part! I wanted to achieve the brushed-aluminum effect but did not have the proper tools to do so. There are specialty shops at Tondo/Recto who can do it for a fee, but I wanted to challenge myself and see if I could do it D.I.Y. style.

With the aluminum plate already clean and sanded smooth (so that there are no more deep scratches), I used a 2"x4" plank of wood as a straight edge guide so that my "brushing" strokes are very straight. You can opt to do without a guide, but I recommend having one so that your brushed lines will be very straight as if it came from a aluminum brushing machine.

Using a sanding block, I used 120 grit sandpaper (you can use 240 grit if you want finer brush lines) and sanded in a steady and fluid motion from top to bottom without stopping (do not stop in the middle of the plate if you want a very straight brush line!). Blow out the powdery flakes between each sanding, as they may induce mini scratches while you're sanding. I repeat, blow only, do not wipe,or you may end up scratching the surface. Only sand in one direction, do not sand up and down like crazy, or you will end up having dirty and inconsistent scratch lines. And always wear the proper safety equipment (googles, mask) for health and safety reasons:


Here is a test sample of a brushed look halfway done. Notice the micro circular scratches still evident, so I had to re-do the "sand smoothing out process" (experimental mode pa kasi dito, but I had fun hehe):


Once done, you can also polish your aluminum plate with a metal polish and cloth for that added sheen (optional but not required). Please note that this step will surely give you a heck of an arm workout if you proceed, and may induce scratches if not done (wiped) properly (only wipe in an up and down pattern across the brush grain):


Sample before and after shots:


Sample of finished product (I was so excited that I "brushed" first before drilling the holes at the middle, so I ended up doing the sanding and brushing process all over again. Lesson learned :p ):


Notice that there is a slight scratch at the bottom left part of the plate, so I had to re-do everything all over again. So I advice you to check out and make sure that there are no more deep scratches or you'll end up re-doing everything again like I did:


Mock-up of attenuator knob and binding posts attached:
« Last Edit: May 28, 2015 at 11:30 AM by RXV »
FB: W Acoustics
Shopee: w_acoustics
IG: w_acoustics
OLX: wacoustics
VIBER / CONTACT: 0927-7904686

Offline RXV

  • Trade Count: (+112)
  • DVD Guru
  • ****
  • Posts: 1,528
  • The difference is in the detailsssss...
  • Liked:
  • Likes Given: 1
Re: RXV's D.I.Y. builds
« Reply #7 on: May 26, 2015 at 06:32 PM »
COMPLETING THE FINISHING DETAILS
The finishing part took the longest time for the whole project to finish. Not only was it difficult, but it was also time consuming and really tests your patience. The detail that it requires to finish it as intended cannot be rushed and require fluid and consistent hand movement.

The finishing part consists of the following:
- Hardwood Side Panel finishing
- Wooden baseplate finishing
- Flush-mounted magnetic grill
- Labeling decorations
- Extra Accessories
- Sanding/Buffing/Waxing
- And bolting everything to place

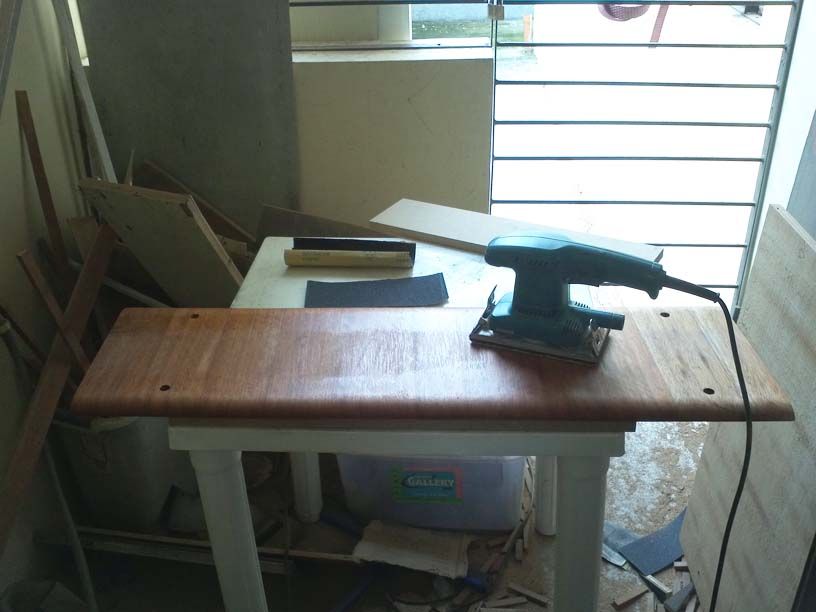
Here the side panels are coated with sanding sealer. I actually preferred not to use this, because it was an added procedure, it would add to the total expense, and they say that it decreases the durability of the topcoat. But for this project this was needed, based on my testing and experimentation, so that the curves in the side panels would have a uniform color/depth with the rest of the wood (it has more wooden pores in that area so it absorbs more stain and or paint). The only cons of this extra procedure, other than the extra effort/time, was that it lessened the visibility grain variations of the wood, so the grain patterns are smoother now and way less visible, which I sadly did not favor.


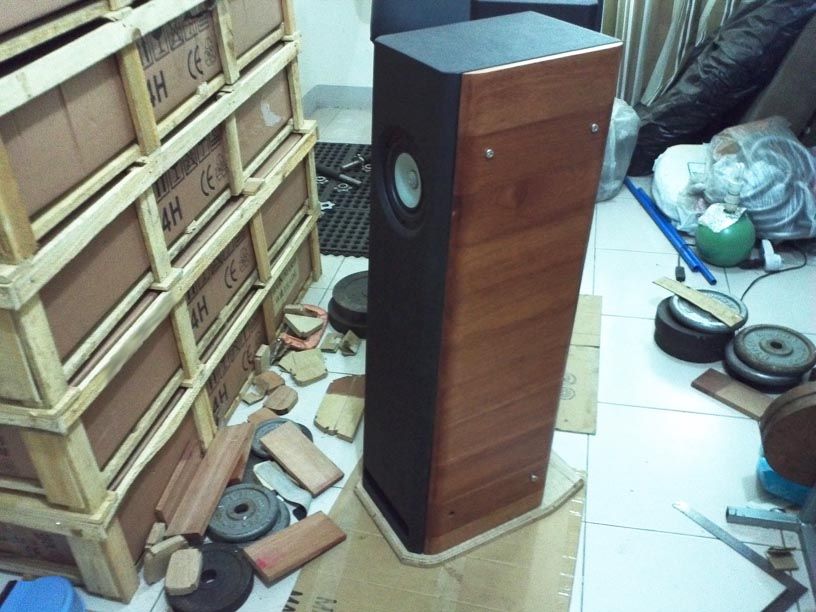
Sample mock-up in enclosure (not yet sanded). I actually liked the "walnut color" look. But for now I'll stick to the original plan of cherry wood color. I'll probably make one in the future :) :


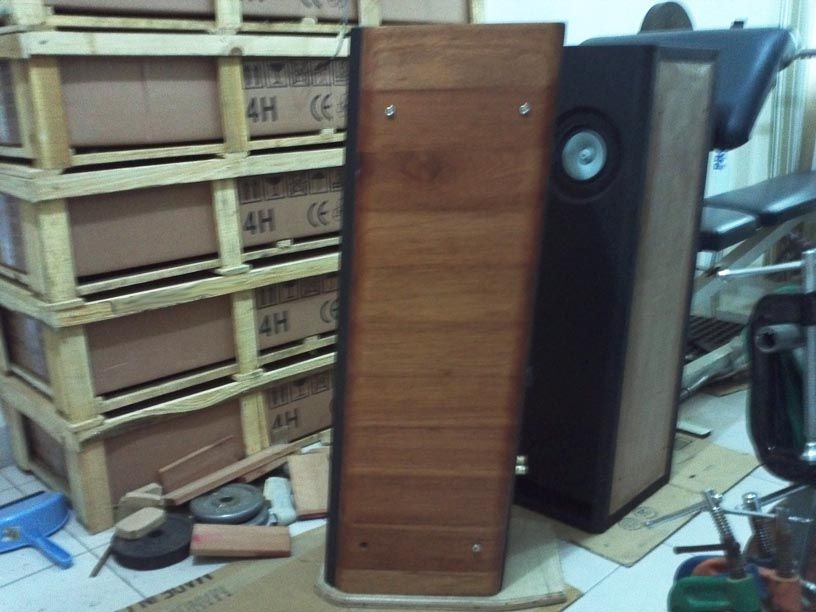
I deliberately put the plank with a circular wood grain pattern on the top portion of this finished side panel, because I thought of it as a "birth mark" and showed the sign of the beauty of wood and its natural characteristics:


Upon drying, excess sanding sealer was removed by sanding:


Side panels were then stained with cherry color. It was not easy because the panels (planks) were not all the same shade/color, so I had to adjust some of the parts with more layers of stain or a "dirty wipe", which I actually didn't really favor because the more layers of stain, the more it hides the grain patterns of the wood. It was then coated with polyurethane topcoat. For now I had coated a total of 4 coats, with light sanding in between coats. I intend the final phase to have a coat of 12-15 for a glass-like effect. But all-in-all, for now, I was happy to do such a good job for a first timer:


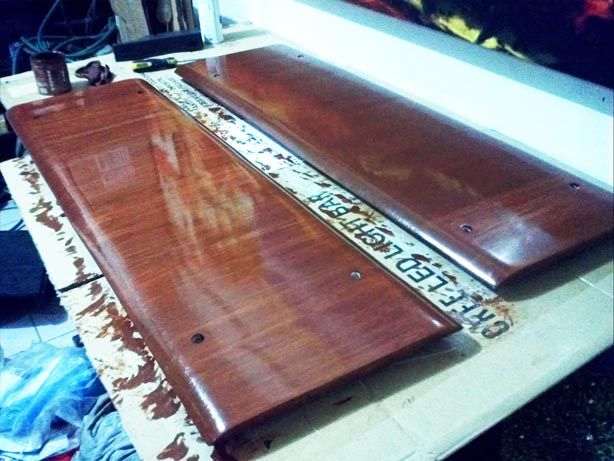
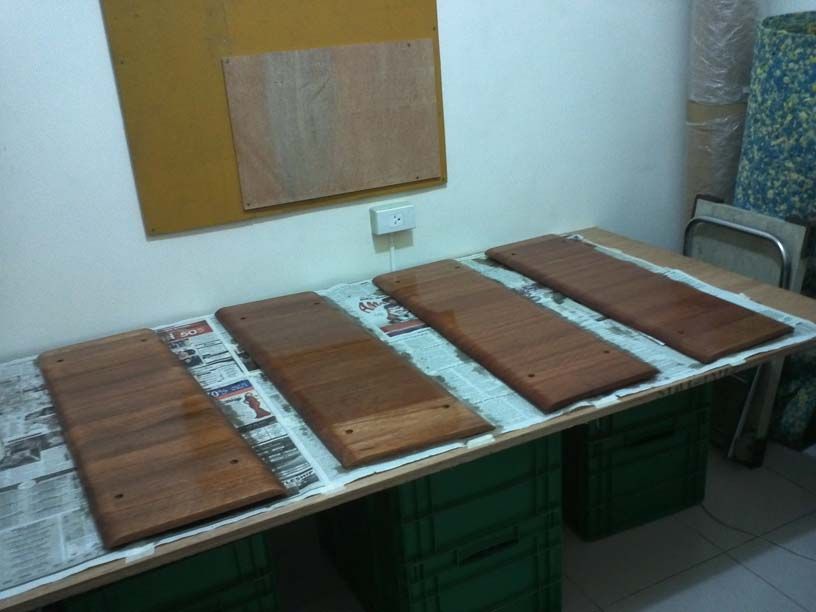
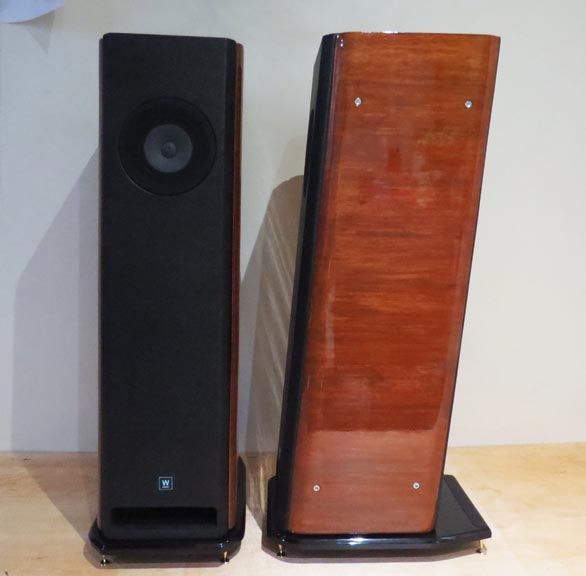
Here are some pictures of the finished side panels (well, sort of, since it's only 4 coats and haven't been polished yet):


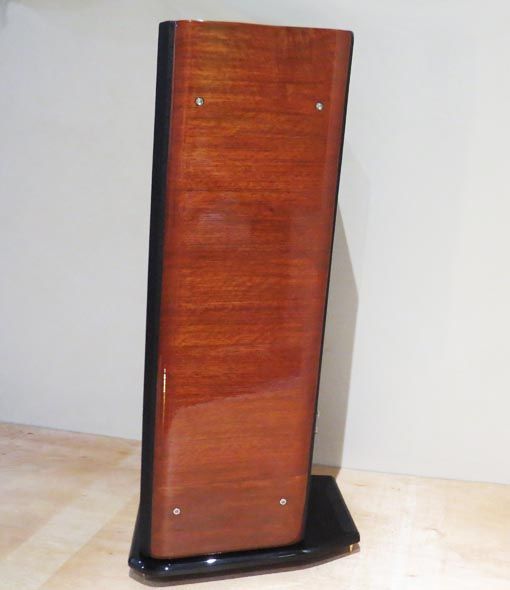
The color of the side panels vary depending on the angle and lighting. If the room is dark, it looks like dark cherry wood. But when it is well lit, the panels come alive and display their grain patterns with an orange-amber glow (probably due to the oil polyurethane used);


This is one is my favorite panel (all of the panels have slightly different wood patterns because they didn't come from the same tree). The pattern looks like tire tracks when perfectly angled with light (Best to see it personally, the pictures look lame in comparison):


CREATING THE FLUSH-MOUNTED MAGNETIC SPEAKER GRILL

In creating the speaker grill, the following were my conditions in making them:
- I didn't want any screws to be seen nor any pegs used (hence holes in the speaker cabinet)
- the grill must be flush-mounted. I didn't like the idea of a grill that's just on top of the cabinet. I want to the front facia to be dead-flat
- the speaker cabinet must still look complete even when the grill is removed
- the speaker grill must have a very sound-transparent cloth but at the same time be able to protect the speaker from accidental "poking" and dirt, AND still visibly show how the drivers look (sumisilip)

The grills are cut using a router and a circle jig guide on a 1/2" recycled plywood:


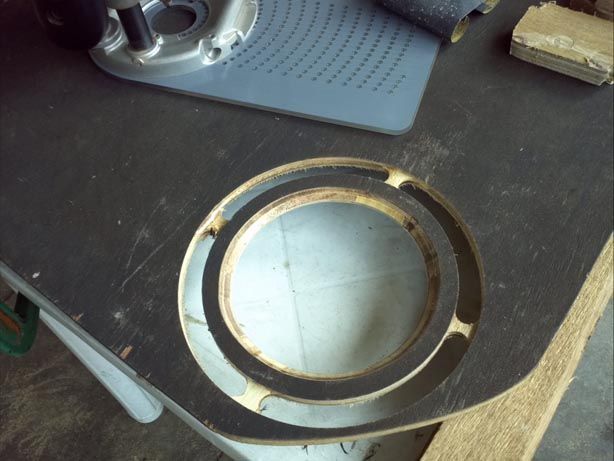
I beveled both the inner and outer part of the grill using a router, which was a bit tricky, considering how small and thin the wood already is, and at the same time must perfectly fit the also beveled speaker hole of the cabinet enclosure:


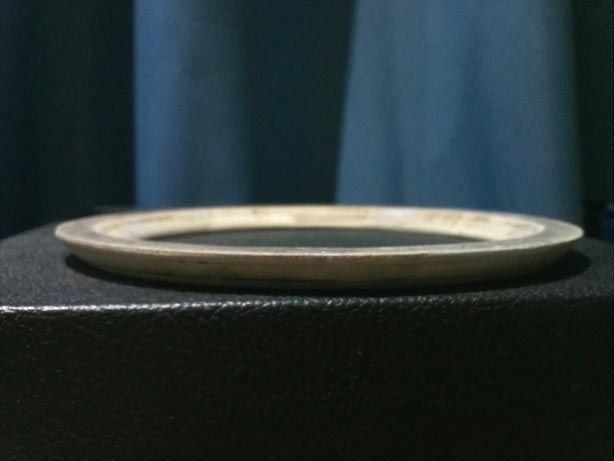
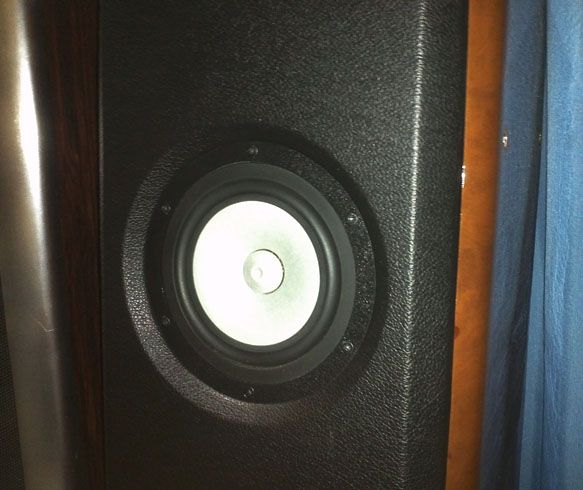
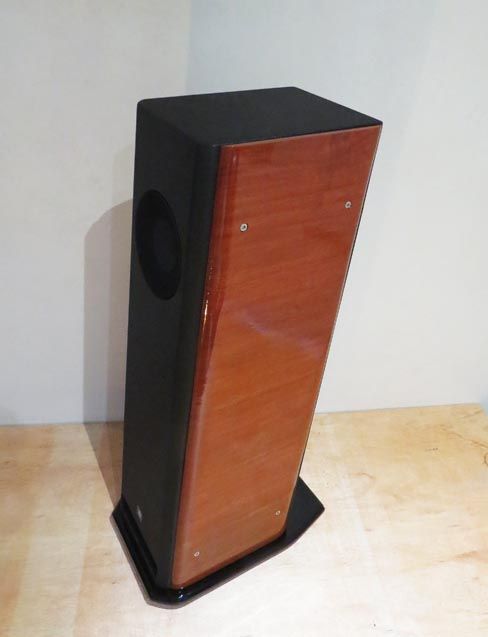
Here is a picture of the enclosure without the speaker grill (beveled flush-mount):


It is then sanded, plastered (for imperfections), and then painted flat black. Surface holes are then drilled where the small neodymium magnets are attached (with adhesive), which are perfectly aligned with the screw holes of the driver. I made sure that the neodymium magnets did not interfere with the speaker drivers, luckily they didn't:


Making sure the grill fits the beveled hole perfectly:


Added sound-transparent mesh-type stretchable cloth and stapled them at the back:


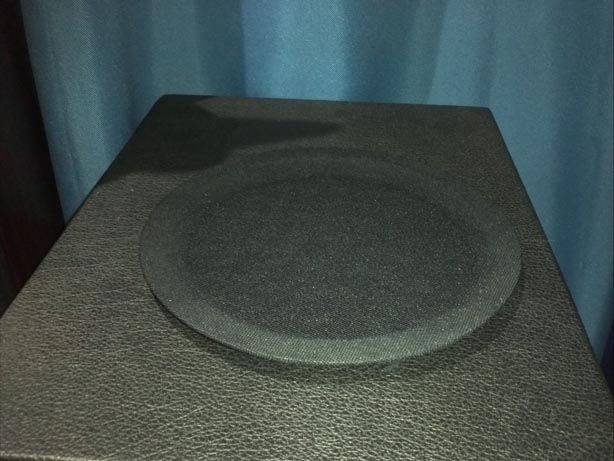
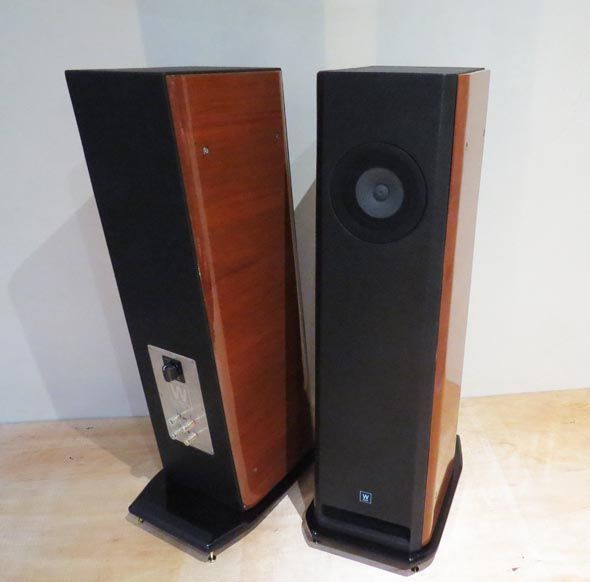
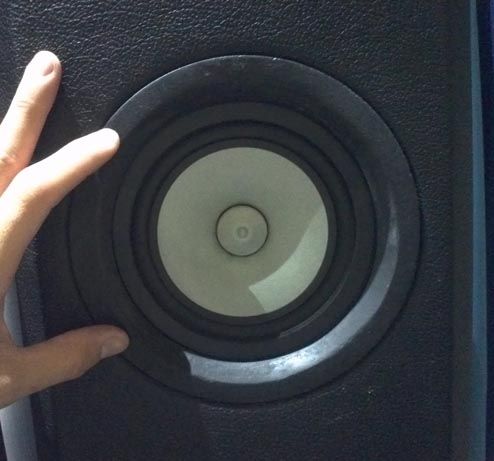
Here you can see that the drivers are still partially visible even when the grills are attached:


At a certain angle, the speakers grills holes go black:


For now, I still have to adjust the neo magnets, since the grills are slightly still protruding by around 1-1.5mm. Konti na lang, hindi pa nagflush :)


FINISHING ACCESORIES
These are not required but however add to the details and value to the whole project

All-stainless hex bolts for the side panels, wrapped with teflon to prevent any air from possibly escaping in the holes of the T-nuts. Would you believe just these bolts already cost P600+? :p


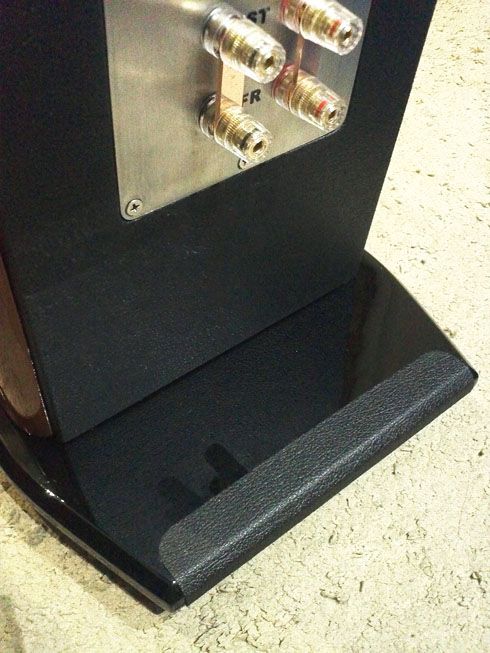
Rear speaker terminal plate added with labels for a more professional look:


I will upgrade the front logo with brushed aluminum and create DIY pure solid copper jumpers for the rear binding posts:


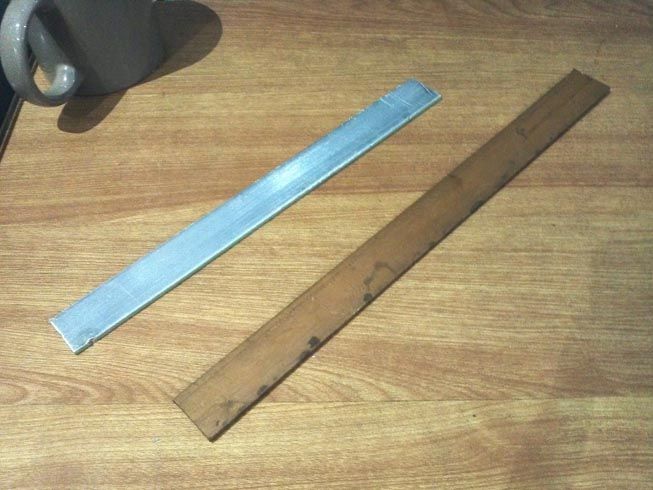
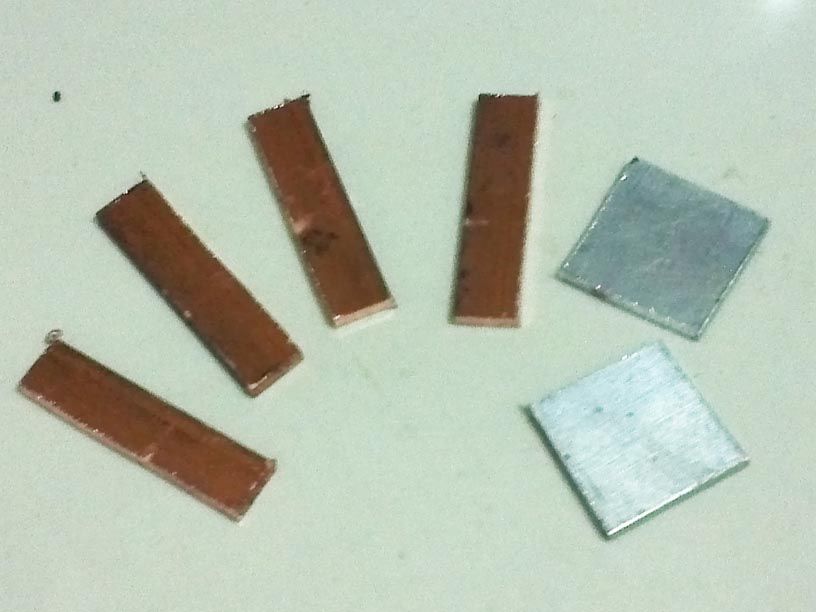
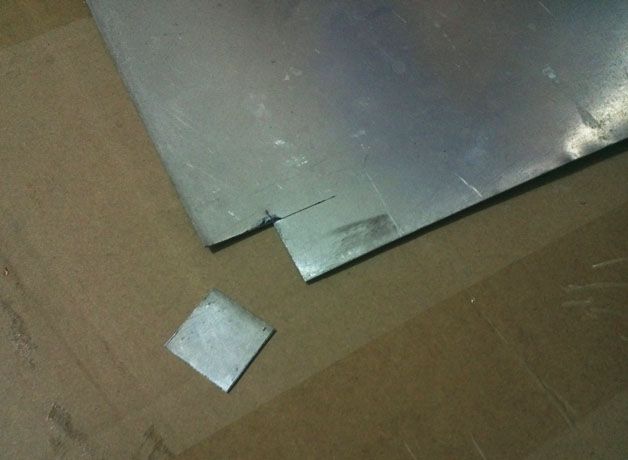
Aluminum and copper sheets cut to size:


Copper strips are clamped then drilled:


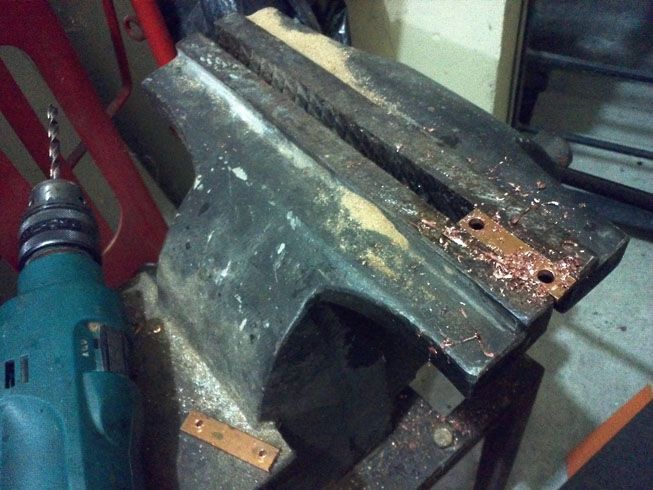
They are then cut using a jigsaw with metal bit:


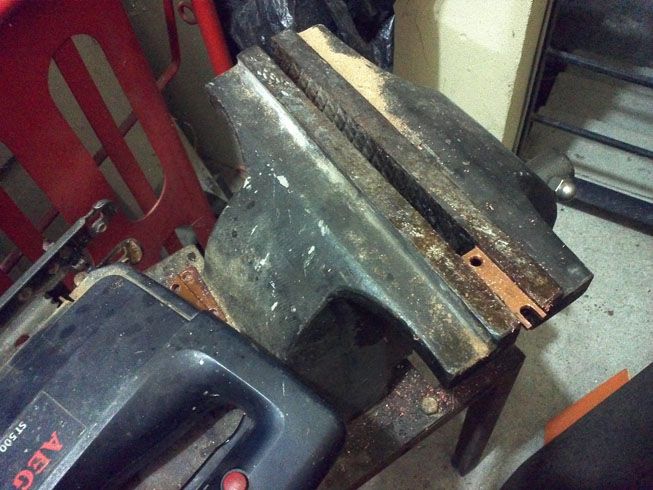
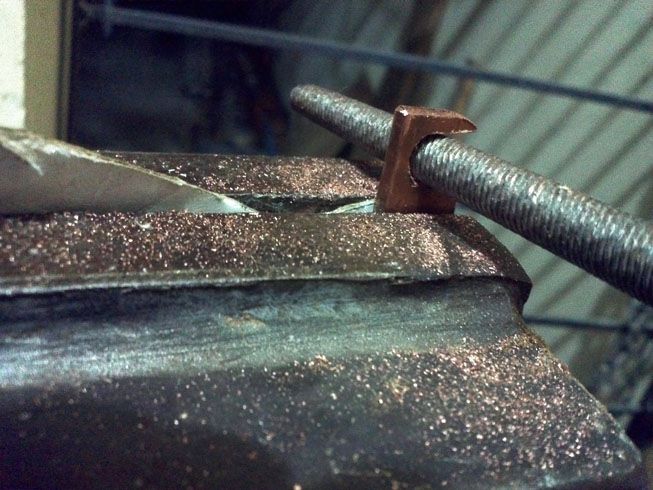
Now the fun (and hard) part: manually filing each one until they fit the binding posts perfectly:


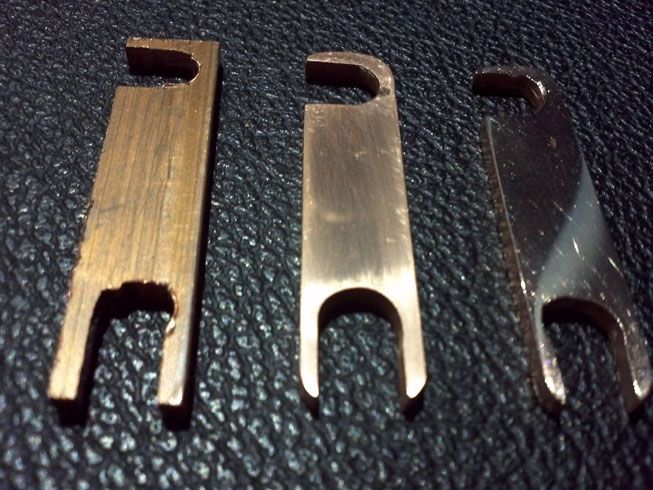
Before and after picture (Right piece has been filed and sanded with 240, 400, 800, 1500, and 2000 grit):


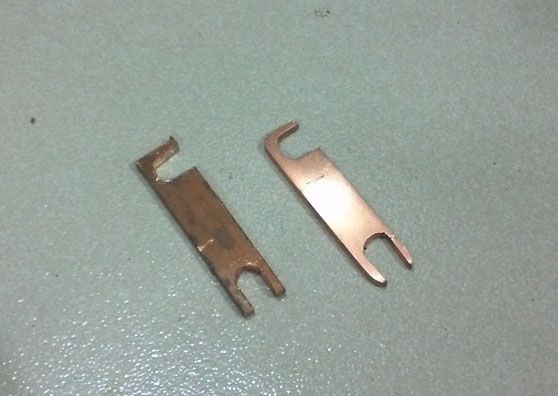
Evolution of the copper jumper (raw, sanded, and buffed with rubbing compound). Note that there are still some scratches with the buffed copper jumper, it is easily scratched even when just wiping with cloth! So be careful :


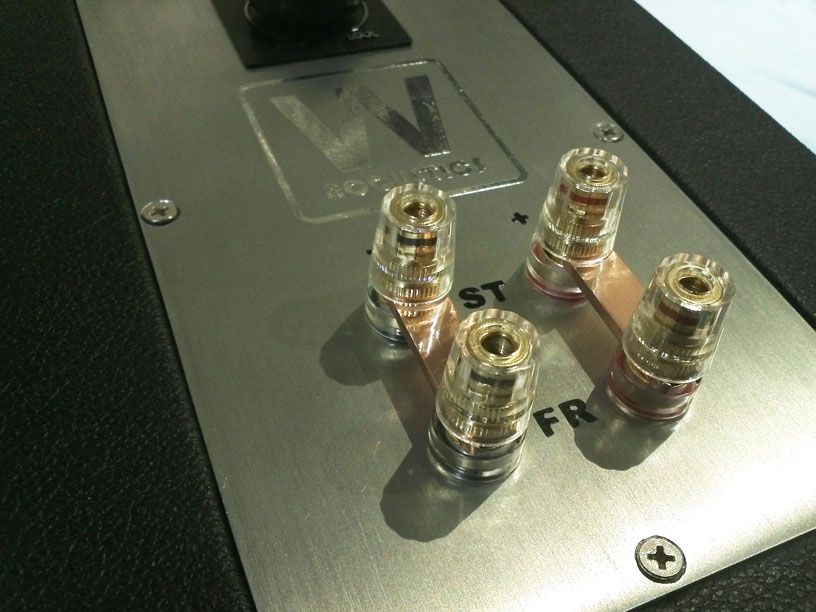
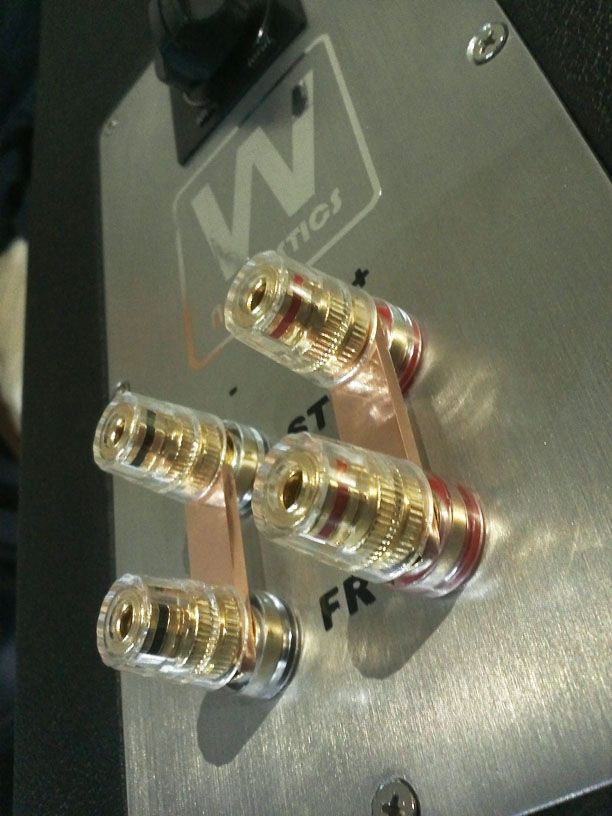
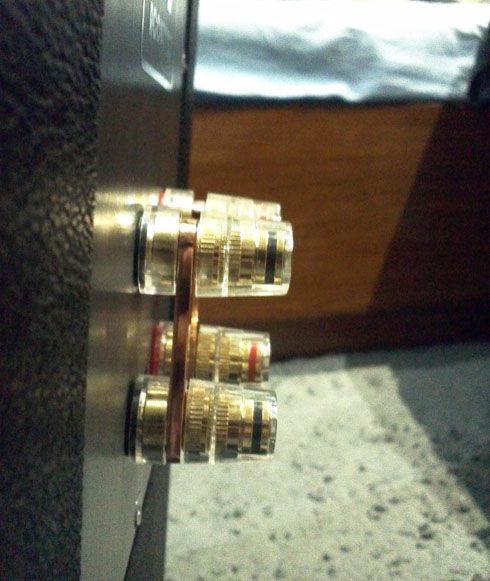
Pictures of the copper binding post attached to the speaker terminals:


A leather accent has been attached at the back side of the baseplate to provide better aesthetic balance and cohesion of the enclosure theme:


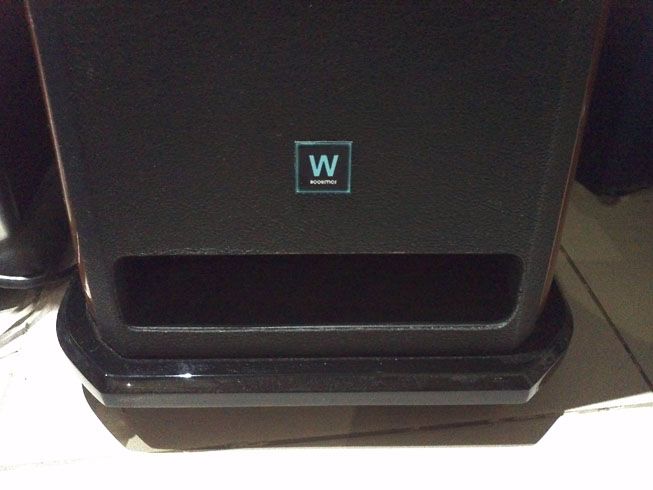
Next up: Upgrading the front logo. The old one is made from a printed sticker that doesn't that exactly fit the enclosure's classy design. It will be replaced by a more simple and appropriate logo:


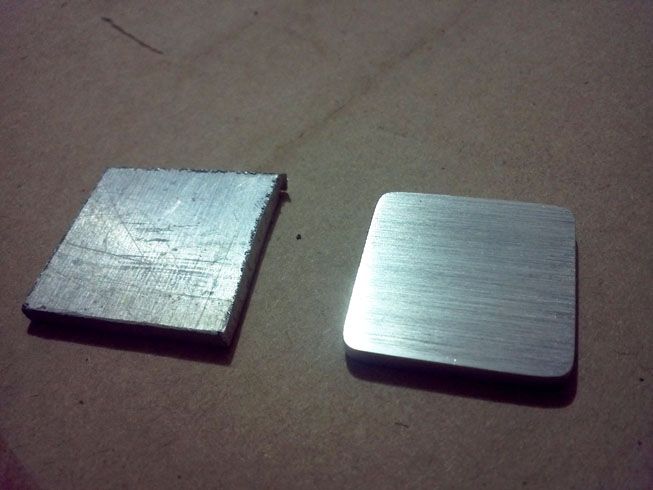
The cut aluminum will be trimmed to the exact size, then filed to clean up the edges, sanded to smoothen the surface, then sand brushed like what was done to the rear speaker terminal plate:


Here is the before and after pictures of the brushed aluminum logo platform:


Chrome sticker placed to achieve the final finish:


UPDATE: Unfortunately, as good as the brushed aluminum logo seems, it did not match with the enclosure and was too flashy (bright). I'll probably just use it for another project... sayang e.
So back to the drawing board!

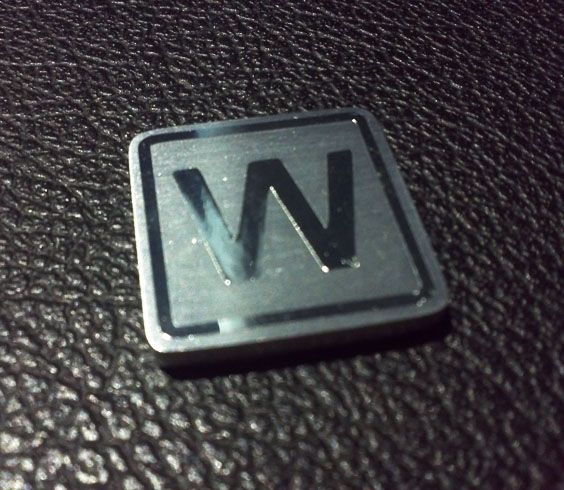
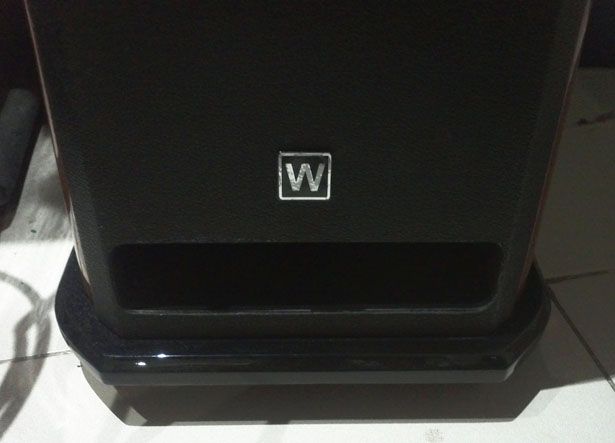
TARGET: The updated logo most not catch too much attention in the front part, and at the same time must still be noticeable as well as have a classy but modern design. So I cut up an aluminum square sheet as a base and sanded and filed it to size:


Cut aluminum sheet is then applied with carbon fiber sheeting and then with chrome logo:


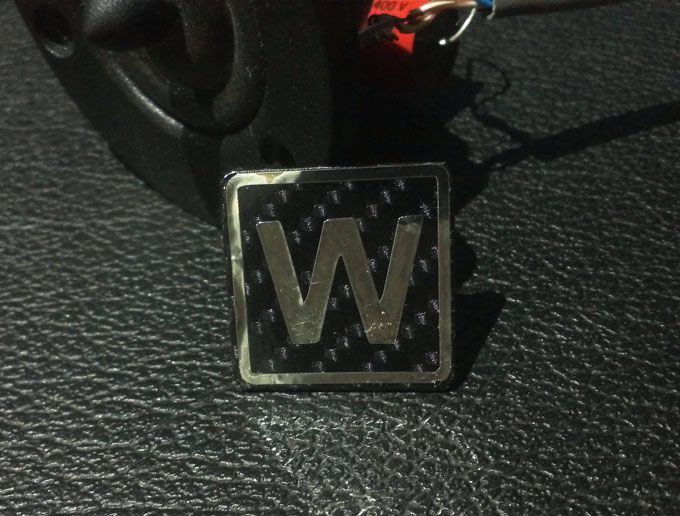
Another angle with light spotted onto logo:


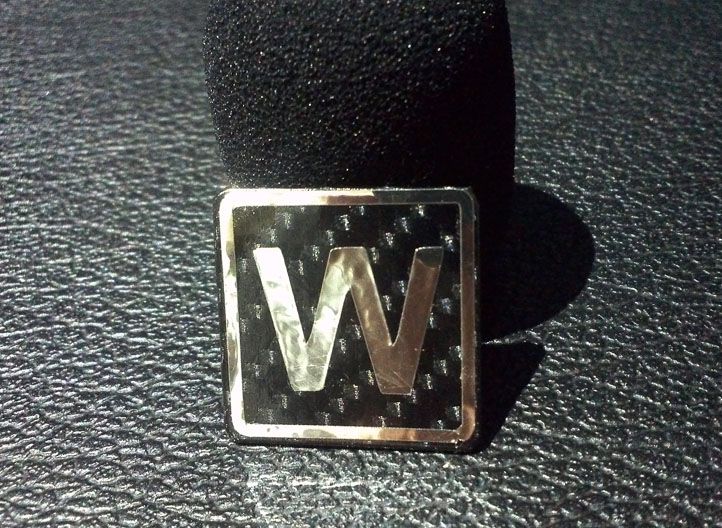
That's better! Simple and classy (with a modern twist):


Thanks for viewing! :)
« Last Edit: Jun 02, 2015 at 12:03 AM by RXV »
FB: W Acoustics
Shopee: w_acoustics
IG: w_acoustics
OLX: wacoustics
VIBER / CONTACT: 0927-7904686

Offline RXV

  • Trade Count: (+112)
  • DVD Guru
  • ****
  • Posts: 1,528
  • The difference is in the detailsssss...
  • Liked:
  • Likes Given: 1
Re: RXV's D.I.Y. builds
« Reply #8 on: May 26, 2015 at 06:33 PM »
UPGRADING THE IN-CABINET ACOUSTIC FILL:
Being an avid D.I.Y.'er, I love tinkering with stuff. So when I saw PinoyDVD member sir Nelson De Leon's offer for an acoustic foam for testing and experimentation, I didn't hesitate to take the opportunity. What have I got to lose? :)


There are many reviews and opinions in the web about using acoustic foam both for room acoustics as well as in-speaker cabinet placements. But the technical aspects sometimes clash with actual results, because there are too many factors to consider (room/cabinet design, specific frequency corrections, volume displacement, etc), so I will just forgo the technical aspects here and just give an "actual" impression whether I hear an improvement in my system using the acoustic foam or not.


THE SPEAKER ENCLOSURE
As posted in my own thread, my speakers are a pair of Markaudio Alpair 10P (paper cone) installed in a D.I.Y. full tower enclosure. For me, The Markaudio drivers provide an impeccable sound quality way way beyond its pricetag: Tight and musical lows, the perfect midrange magic (for me), and adequate highs. I created the tower enclosures to the finest specs that my skill and knowledge can muster and be executed, so I expected a distortion-free and "perfect" enclosure mated for the Alpairs.


Prior to the installation of the acoustic foam, the tower enclosure had already been filled with fiberfill as recommended by the original manufacturer and designer of the Markaudio drivers. I've been using the drivers for over a year now, without making any modifications to the acoustic fill, since I didn't see a need to. My ears were already satisfied.


HYPOTHESIS
My guess is that the acoustic egg crate foam will act more of an absorber rather than a diffuser (because of its egg crate shape), and will have more of an impact (improvement) in the bass region, as well as some reflections that may cause possible distortion inside the cabinet.

INSTALLING THE ACOUSTIC FOAM
Installing the egg crate acoustic foam was very straightforward and simple, just cut the foam to your desired size, and stick it at the wall(s) of your desired placement for absorption.

In my case, I just replaced the fiberfill with the acoustic egg crate foam at the wall behind my drivers, with an extra 1-2" allowance on the top and bottom of the driver to maximize coverage. In all other areas, the original fiberfill is retained.


Here the drivers are removed and the acoustic egg crate foam to be placed inside the towers:


Inside picture of the acoustic egg crate absorbers adhered behind the speaker driver. The foam looks small, but only because it is covered by the fluffed-up fiberfill at the sides:


LISTENING IMPRESSIONS
All other factors are kept the same for controlled experimentation such as gears used, room acoustics, and speaker placement. Gears used were just a simple PC for playing FLAC files connected to a DAC then to a tube amp.

Upon listening to some familiar music files, I was actually astounded to hear such a nice improvement in the voice/mids section! It is hard to explain, but the voice of the singer is more coherent and 3D-like, and the decay of the breath is more lifelike compared to what I've been hearing for the past year of my usage of the Alpairs. Imaging is now more accurate, and the soundstage improved but only just a little bit. I'm not going to exaggerate that it is a night and day difference, but yeah the acoustic foam is worth it!

The bass did get a little tighter and more accurate (faster), but it was in the mid section that really caught my attention, as it really put a big grin in my face. For the highs, I didn't notice any difference, but do note that the highs of this driver is a bit softer compared to other systems (although they're still very detailed, nothing to complain about).


VERDICT
Is the egg crate acoustic foam worth the upgrade?
Hell yeah! You mustn't even think about it, considering that for just a couple hundred bucks worth for your speakers, you'll get such a noticeable permanent improvement. I didn't expect that my speakers could get any better, because the original recommendations for the fiberfill were already good and adequate (or so I thought).

I would like to thank sir Nelson De Leon for the acoustic egg crate foam absorber. And I recommend others to try it out and hear your speakers (whether D.I.Y. or not) improve and give out their maximum potential.


OTHER EXPERIMENTS/NOTES
I was actually impressed by the improvement in my full tower enclosures, that I one day decided to try it out at my car audio speaker setup and see if things will improve or not.

Here you can see my D.I.Y. in-dash speaker enclosure with Markaudio Alpair 7.3 (metal cone) fullrange 4-inchers:


The magnetic grill is then removed:


Then the driver is removed, revealing the fully stuffed fiberfill inside:


The whole fiberfill is replaced with acoustic egg crate foam absorber as shown:


The result? Well, the results here were a little different from my home speakers. In here, mids reproduction improved a lot because the hollowness (echo sound) evident before had vanished, and the surprising thing is that the highs are now more pronounced (in a good way) and better detailed, my guess is because all acoustic reflections inside the small enclosure have been absorbed/diffused, hence decreasing distortion. The lows are not applicable here, since the drivers are cut-off at 160hz high pass, so I can't comment on the lows.

All in all, improvements galore! Although the highs are still not "up to my standards", it is already the fault of my amplifier (matching). The acoustic egg crate foam absorber can only do so much to improve acoustics. Kudos to this simple but wonderful product!

Now, I'm curious if it will now bring any sonic improvements in my D.I.Y. sealed sub enclosure... :)
Sir Nelson, pa-order ako ha!  ;D

« Last Edit: May 29, 2015 at 09:33 PM by RXV »
FB: W Acoustics
Shopee: w_acoustics
IG: w_acoustics
OLX: wacoustics
VIBER / CONTACT: 0927-7904686

Offline nbc

  • Trade Count: (+67)
  • DVD Guru
  • ****
  • Posts: 1,264
  • Hi, I'm new here!
  • Liked:
  • Likes Given: 0
Re: RXV's D.I.Y. builds
« Reply #9 on: May 26, 2015 at 07:03 PM »
Pwede magpagawa sa iyo, Boss?

nbc
***Take a Walk on the Dark Side***

Offline RXV

  • Trade Count: (+112)
  • DVD Guru
  • ****
  • Posts: 1,528
  • The difference is in the detailsssss...
  • Liked:
  • Likes Given: 1
Re: RXV's D.I.Y. builds
« Reply #10 on: May 26, 2015 at 07:14 PM »
Pwede magpagawa sa iyo, Boss?

nbc

Haha sorry sir, hindi ako gumagawa for business, katuwaan lang for personal enjoyment. MagDIY na kayo sir :)
FB: W Acoustics
Shopee: w_acoustics
IG: w_acoustics
OLX: wacoustics
VIBER / CONTACT: 0927-7904686

Offline Courage

  • Trade Count: (+65)
  • PinoyDVD Legend
  • *****
  • Posts: 11,280
  • Liked:
  • Likes Given: 10
Re: RXV's D.I.Y. builds
« Reply #11 on: May 26, 2015 at 07:20 PM »
Nakaka excite naman makita build mo bro.... Galing..
Walang Setup

Offline nbc

  • Trade Count: (+67)
  • DVD Guru
  • ****
  • Posts: 1,264
  • Hi, I'm new here!
  • Liked:
  • Likes Given: 0
Re: RXV's D.I.Y. builds
« Reply #12 on: May 26, 2015 at 07:20 PM »
No space sa condo para gumawa. Haha.

nbc
***Take a Walk on the Dark Side***

Offline nogo

  • Trade Count: (+22)
  • Collector
  • **
  • Posts: 479
  • Liked:
  • Likes Given: 5
Re: RXV's D.I.Y. builds
« Reply #13 on: May 26, 2015 at 09:56 PM »
Following thread.
LG42LA6200
Marantz SR5008/NR1604(O)
BW685S2/Q3020 (O)
SVS PB1000/SB12NSD (O)
PCHA410
BD-F5500K

Offline mykel18

  • Trade Count: (+47)
  • PinoyDVD Legend
  • *****
  • Posts: 2,387
  • Liked:
  • Likes Given: 0
Re: RXV's D.I.Y. builds
« Reply #14 on: May 27, 2015 at 07:33 AM »
Subscribing
HT: JBL | A&D | Denon | LG
Audio: Naim | DeVore Fidelity | Roksan | Dynavector

Offline Superman

  • Trade Count: (+138)
  • PinoyDVD Legend
  • *****
  • Posts: 12,157
  • Master Showman Presents...
  • Liked:
  • Likes Given: 366
Re: RXV's D.I.Y. builds
« Reply #15 on: May 27, 2015 at 07:36 AM »
D.I.Y. BUILD: Markaudio Alpair 10P tower enclosure


THE CHALLENGE:
1. To D.I.Y. a full tower speaker enclosure all made from raw/basic materials/components.
2. To create an enclosure that is both rigid and acoustically designed for the drivers to be used.
3. To design an enclosure and where some parts can be changed/altered to fit different environments(rooms) for future use (in other words, changeable/adaptable design)
4. All parts must be hand-made/sculpted using tools and standard equipment easily purchased from any local hardware store.


SPEAKER ENCLOSURE FINAL BUILD FEATURES:


OTHER DETAILS TO FOLLOW...

Congratulations!
Fyne|EAR|Hana|Technics|SAEC|Wiim|Western Electric|Audiolab|Acrolink|Oyaide|Oppo|Tellurium

Offline tony

  • Trade Count: (+5)
  • PinoyDVD Legend
  • *****
  • Posts: 4,116
  • Enjoy the hobby and be happy always!
  • Liked:
  • Likes Given: 7166
Re: RXV's D.I.Y. builds
« Reply #16 on: May 27, 2015 at 12:11 PM »
Haha sorry sir, hindi ako gumagawa for business, katuwaan lang for personal enjoyment. MagDIY na kayo sir :)

congrats, now i am sure you know the feeling.......priceless.....;)
« Last Edit: May 27, 2015 at 08:21 PM by tony »
how do we defend our freedom? by the truth when it is assaulted by Marcos lies....

Offline Oldboyracer

  • Trade Count: (+1)
  • DVD Guru
  • ****
  • Posts: 1,289
  • May the upgrade be with you
  • Liked:
  • Likes Given: 26
Re: RXV's D.I.Y. builds
« Reply #17 on: May 27, 2015 at 08:13 PM »
Looking good RXV  :)
Emotiva XSP-1 & XPA-DR2, SMSL VMV D1, ND8006
SL1200 MK6
MS  Performance 6 LE
HT - Substantial

Offline sientobente

  • Trade Count: (+21)
  • PinoyDVD Legend
  • *****
  • Posts: 3,043
  • H i F i v e!
  • Liked:
  • Likes Given: 64
Re: RXV's D.I.Y. builds
« Reply #18 on: May 27, 2015 at 10:29 PM »
very nice thread sir! bookmarked!

Offline Superman

  • Trade Count: (+138)
  • PinoyDVD Legend
  • *****
  • Posts: 12,157
  • Master Showman Presents...
  • Liked:
  • Likes Given: 366
Re: RXV's D.I.Y. builds
« Reply #19 on: May 28, 2015 at 06:42 AM »
Impressive!

Your finished project is all about PASSION!
Fyne|EAR|Hana|Technics|SAEC|Wiim|Western Electric|Audiolab|Acrolink|Oyaide|Oppo|Tellurium

Offline meat_eater

  • Trade Count: (+95)
  • DVD Guru
  • ****
  • Posts: 1,530
  • Liked:
  • Likes Given: 1
Re: RXV's D.I.Y. builds
« Reply #20 on: May 28, 2015 at 07:24 AM »
Oh wow! Ganda ng finish!
Bite Hard and SHAKE

Offline JoeyGS

  • Trade Count: (+28)
  • PinoyDVD Legend
  • *****
  • Posts: 2,717
  • Let your ears decide!
  • Liked:
  • Likes Given: 181
Re: RXV's D.I.Y. builds
« Reply #21 on: May 28, 2015 at 09:45 AM »
Barvo!  thanks for sharing!  If Mark Fenlon can see this .... he would be all smiles!

Offline Courage

  • Trade Count: (+65)
  • PinoyDVD Legend
  • *****
  • Posts: 11,280
  • Liked:
  • Likes Given: 10
Re: RXV's D.I.Y. builds
« Reply #22 on: May 28, 2015 at 10:11 AM »
Awesomeeee!!!!!!
Walang Setup

Offline luis

  • Trade Count: (+67)
  • DVD Guru
  • ****
  • Posts: 1,447
  • All in heaven's time.
  • Liked:
  • Likes Given: 26
Re: RXV's D.I.Y. builds
« Reply #23 on: May 28, 2015 at 10:17 AM »
grabe sir! ang husay!  ;D

Offline CoolTOYZPH

  • Trade Count: (+166)
  • PinoyDVD Legend
  • *****
  • Posts: 2,407
  • Break-in done... time to enjoy the music
  • Liked:
  • Likes Given: 73
Re: RXV's D.I.Y. builds
« Reply #24 on: May 28, 2015 at 10:23 AM »
Me too :)
Pwede magpagawa sa iyo, Boss?

nbc
Where is the Love? BEP

Offline John E.

  • Trade Count: (+18)
  • PinoyDVD Legend
  • *****
  • Posts: 4,382
  • God is good all the time!
  • Liked:
  • Likes Given: 25
Re: RXV's D.I.Y. builds
« Reply #25 on: May 28, 2015 at 10:45 AM »
wow!
You'll Always Go Back To This Hobby!

Offline remington

  • Trade Count: (+77)
  • PinoyDVD Legend
  • *****
  • Posts: 2,102
  • Liked:
  • Likes Given: 107
Re: RXV's D.I.Y. builds
« Reply #26 on: May 28, 2015 at 11:38 AM »
very nice bro! very detailed picture I'm sure madami maiinspire mag diy nyan hehehe!!!
tube + audio nirvana = beyond...

Offline fredreadrick

  • Trade Count: (+29)
  • DVD Addict
  • ***
  • Posts: 598
  • MarkAudioNirvana
  • Liked:
  • Likes Given: 89
Re: RXV's D.I.Y. builds
« Reply #27 on: May 28, 2015 at 12:28 PM »
madami maiinspire
isa na ako dyan!

@sir RXV.... WOW!!!
btw, saan ginamit yung llave tubo? >:D

Ultimately, musicality—not dissecting the sound
—is what high-end audio is all about. - R. Harley

Offline remington

  • Trade Count: (+77)
  • PinoyDVD Legend
  • *****
  • Posts: 2,102
  • Liked:
  • Likes Given: 107
Re: RXV's D.I.Y. builds
« Reply #28 on: May 28, 2015 at 12:43 PM »
may nakatagong tubo sa loob yan bro ;D >:D >:D >:D
« Last Edit: May 28, 2015 at 12:43 PM by remington »
tube + audio nirvana = beyond...

Offline RXV

  • Trade Count: (+112)
  • DVD Guru
  • ****
  • Posts: 1,528
  • The difference is in the detailsssss...
  • Liked:
  • Likes Given: 1
Re: RXV's D.I.Y. builds
« Reply #29 on: May 28, 2015 at 05:47 PM »
Thanks guys!

Haha the llave tubo was only used as a paperweight (and also for pounding my head kung inaantok na ako :) )

Sorry for the crappy pics, cellphone lang kasi gamit ko, very convenient in the pocket while doing DIY tasks :)
FB: W Acoustics
Shopee: w_acoustics
IG: w_acoustics
OLX: wacoustics
VIBER / CONTACT: 0927-7904686